Configure A2A connections for an agentic virtual agent
Series: Create an agentic virtual agent
Previous suggested step: Connect an agentic virtual agent to knowledge
Next suggested step: Configure the start and exit behavior of an agentic virtual agent
Configure your agentic virtual agents to invoke external AI agents from third-party platforms, such as ServiceNow and Salesforce. Genesys Cloud currently supports the open Agent2Agent (A2A) Protocol, with support for more agent integration protocols planned for future releases.
Using an A2A connection, your agentic virtual agent can delegate specialized tasks to an external AI agent and use its results within the same customer conversation. The agentic virtual agent remains the sole customer-facing conversation owner, and only the fields that you map are shared with the external agent.
Before you create an A2A connection for an agentic virtual agent, you must install and configure the External A2A Server integration. For more information, see Install External A2A Server integration and Configure the External A2A Server integration.
Create an A2A connection
- Click Menu > Orchestration > AI Studio > Agentic Virtual Agents.
- (Optional) To search for a specific agent, start typing the name of the agent in the search box. As you type, matching agents appear.
- To open an AI agent, click the agent’s tile. The Agent profile view opens.
- Click the A2A tab.
- Click Create. The A2A Connection Name view opens.
- In the Name field, enter a meaningful name that describes the purpose of the A2A connection or the interaction that it enables between agents. For example, “Retrieve customer tickets” or “Create support request.”
- In the Description field, enter a high-level summary of what the A2A connection does, when it should be used, and what it returns. For example, “Retrieves customer ticket details using a ticket ID.”
- Under Source, click Select. The Select source panel opens.
- (Optional) To search for a specific External A2A Server integration, start typing its name in the search box. As you type, matching integrations appear.
- Select the required External A2A Server integration and click Select. The connection overview displays the selected external AI agent’s details, including its name, description, and skills. Each skill includes a name, a capability description, and associated metadata tags.
- Review the information, and then click Next.
- Review the A2A connection details, and then click Create. The A2A connection is created, and the external AI agent appears as a tile on the A2A tab.
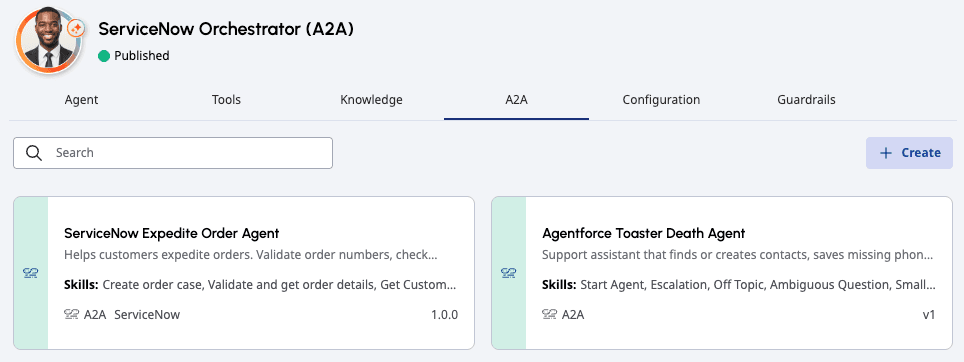
- Although external AI agent cards include a default name and description, you can override them with a custom name and description for the connection.
- Skills are descriptive labels that help the agentic virtual agent determine when to delegate a task to the external AI agent. They are not individually callable tools. Instead, the agentic virtual agent invokes the A2A connection as a whole.
- The preview widget allows you to test your A2A connections and review the information exchanged with the external AI agent, including the inputs and outputs. For more information, see Preview an agentic virtual agent.
Edit an A2A connection
- Find the external AI agent that you want to edit, and then click its tile.
- Click Edit. The connection overview appears.
- Make the required changes, and then click Next.
- Review the A2A connection details, and then click Update.
Delete an A2A connection
- Find the external AI agent that you want to delete, and then click its tile.
- Click Delete. The Delete A2A dialog box appears.
- Click Delete to delete the connection or click Cancel to cancel deletion.
Navigate the agentic virtual agent profile
The profile contains the following sections and a preview widget:

You can switch to any of the sections of the agentic virtual agent while creating a new agent, editing an existing agent, or viewing an agent. Any incomplete section is indicated by the icon preceding the section name. You can save an agent with an incomplete section but you cannot publish the agent until all sections are complete.
After you have completed all necessary sections of the agent setup, you can click Publish to publish the flow.
[NEXT] Was this article helpful?
Get user feedback about articles.