Configure the External A2A Server integration
After you install External A2A Server integration, a Genesys Cloud administrator must add and configure the integration. Then, activate the newly added integration. To configure the integration, you must require the following information:
- A deployed external A2A-compliant agent with a publicly accessible Agent Card URL endpoint.
- The Agent Card JSON endpoint URL for the target agent.
- Credentials for the external agent.
Install the integration and the details about the integration appears. To configure the integration:
- In the Details tab, accept the default name (External A2A Server) or type a different name.
- (Optional) Enter notes in the box provided.
- Select the Configuration tab, then click Connection in the left-hand navigation panel.
- Enter the A2A server endpoint that Genesys Cloud communicates:
- Agent Card URL – The URL pointing to the Agent Card of the external A2A server. The Agent Card describes the agent’s capabilities, skills, and metadata. Obtain this URL from the vendor who deployed the external agent. For example,
https://your-agent.example.com/agent-card.Note: Genesys supports any URL that returns a valid Agent Card. - (Optional) Tags – Labels to categorise this integration. Useful for filtering and managing multiple integrations.
- Credentials – Configure authentication between Genesys Cloud and the external A2A server. Click Configure to set up authentication credentials. Select one of the following Credential Type in the Configure Credentials dialog box.
- Agent Card URL – The URL pointing to the Agent Card of the external A2A server. The Agent Card describes the agent’s capabilities, skills, and metadata. Obtain this URL from the vendor who deployed the external agent. For example,
- To verify the connection, click Connect.
Genesys Cloud fetches the Agent Card from the provided URL and populates the Agent Card section automatically.
- Select the Agent Card tab.
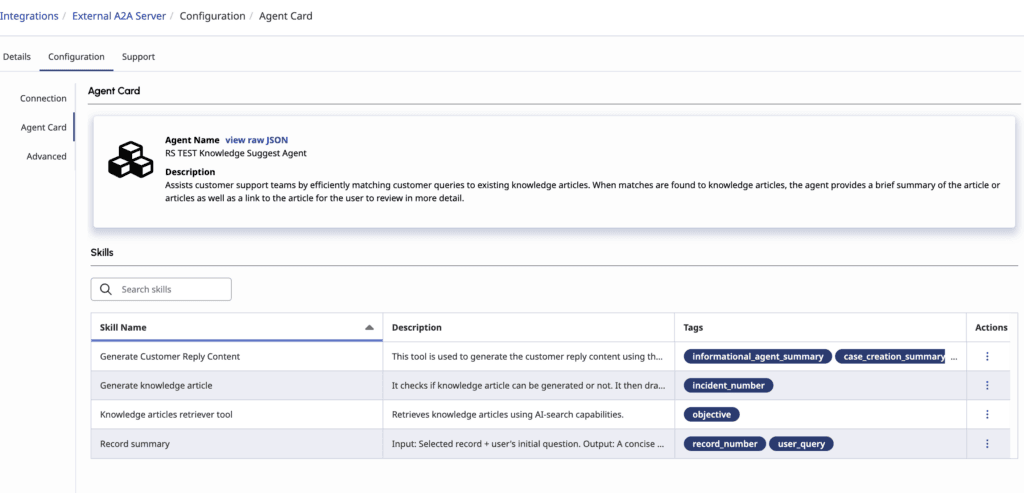
Genesys Cloud fetches and displays the Agent Card metadata. This section is read-only and confirms the agent details retrieved from the external server. The following information is displayed:
- The name of the agent and summary of the agent’s purpose and capabilities, sourced from the Agent Card.
- The list of skills the agent exposes. Each skill has a name, description, and optional input tags that define the expected parameters.
- The option View Raw JSON that provides the full raw Agent Card content in JSON format for diagnostic or verification purposes.
- Click Save & Activate.
The External A2A Server integration is now configured and active. It is available for use in Agentic Virtual Agents (AVAs), which can delegate tasks to the external agent and incorporate its responses into the customer conversation.
[NEXT] Was this article helpful?
Get user feedback about articles.