Configure gamification profile metrics
A profile includes details, metrics, and members. When you create a custom profile, you must configure each of these three profile components.
For more information about how to configure profile details and members, see Configure gamification profile details and Manage profile memberships.
To manage a profile’s metrics, use the Metrics tab in a gamification profile. You can configure a maximum of 50 metrics per gamification profile.
View a profile’s metrics
- Click Menu > Performance Management > Employee Engagement > Gamification Profiles.
- Click a profile.
- Click the Metrics tab.
Click the image to enlarge.

Note: If you are creating a profile, the Metrics tab is not available until you save the profile. When you save the new profile, all metrics and objectives from the default profile are available for inclusion in the new profile.
Metric configuration options
To configure a metric, you can:
- Create a metric that you can customize for this profile. This metric does not sync to the default profile metric.
- Copy a metric from the default profile to this profile. For example, you can copy metrics from the default profile that were added after this custom profile was created. Changes to the default profile metric reflect in the copied metric. You cannot copy a metric from the default profile that is in this profile already. Note: You cannot copy metrics from a custom profile to the default profile.
- Edit an existing metric in this profile.
Create and configure a metric
- Create a profile or edit an existing profile.Note: When creating a profile, the Metrics tab appears after you configure the new profile and click Create Profile.
- Click the Metrics tab. Click the image to enlarge.

- To create a metric, click Create Metric.
- To copy a metric from the default profile:
- Click the default profile metric to copy and then click Copy Metric.
- Click the arrow next to Create Metric, and then click Copy Metric.
- To edit a metric in the profile, click the metric in the list.
- Select the Details tab and in the Display Name box, type the name that you want to appear in agent views and supervisor views for this metric.
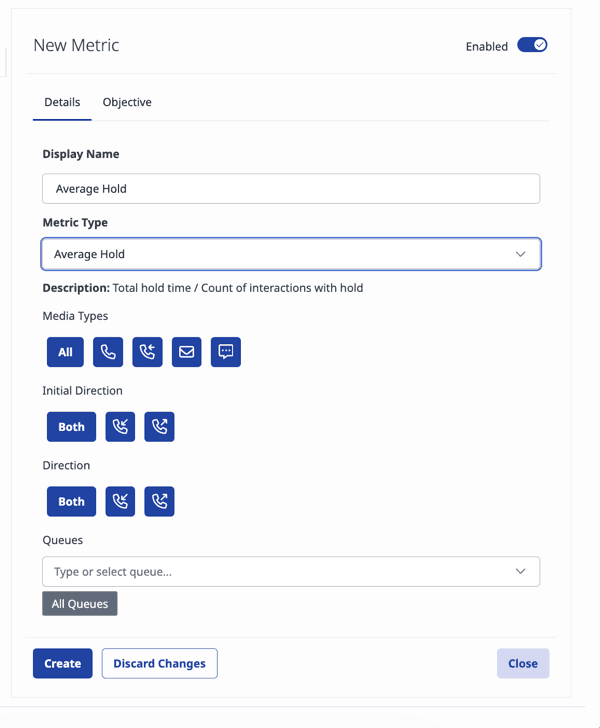
- Under Media Types, select the media types to include in the metric.
- Under Initial Direction, select the initial direction to include in the metric. Available options are Both, Inbound, and Outbound.
- Under Direction, select the direction to include in the metric. Available options are Both, Inbound, and Outbound.
- From the Queues list, select the queue associated with the selected metric type.
- On the Objective tab in the Objective Type list, click the type of objective to use with this metric. Some metrics have a set objective type and you cannot change it.
- Specify which time measurement units that you want to use to configure time-based metrics.
- You can select Hours, Minutes, and Seconds.
- (Optional) You can select decimal precision up to five digits.

- Set the upper and lower limits for each zone, in the unit of measure for the objective type.Note: To use your current analytics to help establish a baseline, see Agents Performance views overview.
- Set the points to award when an agent’s performance falls within a particular zone. You can specify a single point value or a range of points. To switch from one to the other, click the diagonal arrows beside the point box.
- To enable the metric, turn on Enabled.
- Save your changes.
Note: If you configure a new metric in a gamification profile, the new metric appears and tracks performance on agent scorecards within a few seconds. The Scorecard includes performance data for the current day. However, the newly configured metric will only appear on Insights the next day, because Insights only includes performance data up to the day before today.
[NEXT] Was this article helpful?
Get user feedback about articles.